Query Form
The query interface of the web application should be – at least to some extend – quite self explanatory.
Open the Query interface in a browser window. Insert your SQL query in the text area (1) or choose an example query from the “Examples” tab (6) (just double click on one of them) above the text area. Click “Submit” (4) to submit your job. A message appears that shows how your query is reformulated and will be executed. Confirm the query plan with OK if it looks reasonable to you. If something looks not quite right, please report back to us! Any kind of comments or bug reports are most welcome!

Screenshot of the query interface with (1) SQL text area, (2) field for result table name, (3) Short/Long queue, (4) Submit button, (5) Job list, (6) Example queries and (7) Database/Function browser
After successful job submission, your job will appear in the job list in the left side bar (5). Its name corresponds to the result-table name, which is either the current time stamp or a name that you provided in the table field (2) below the query form, before submitting your query. For now, the jobs are sorted by time with the most recent ones at the top.
Above the text area, you can find the “Database browser” (7). This is very useful to find out which columns exist for which table in which database. Hover with the mouse over the columns for a short description. For more information consult the documentation pages on Database tables section in the navigation bar above.
For queries that are expected to take longer than 30 seconds, please switch from “Short queue” (time out after 30 seconds) to “Long queue” (time out after 40 min) (3). For any jobs that take longer than that, you need to break up your task into smaller chunks and submit it piecewise, most probably using the tutorials. Since the jobs are submitted asynchronously, you can close the browser window while waiting for your results to be finished and come back later again at any time.
You can view your results by clicking on the table name for your job in the job list (5) and then choosing the “Results Table” tab (8).
Back in the “Job Overview” tab (9), you can review again which query was executed (10), its query plan, timing (11) etc.
It is also possible to rename your job table or remove the job completely using the buttons just below the job parameters (12).
You can download your results first at the “Download” tab and process them further.
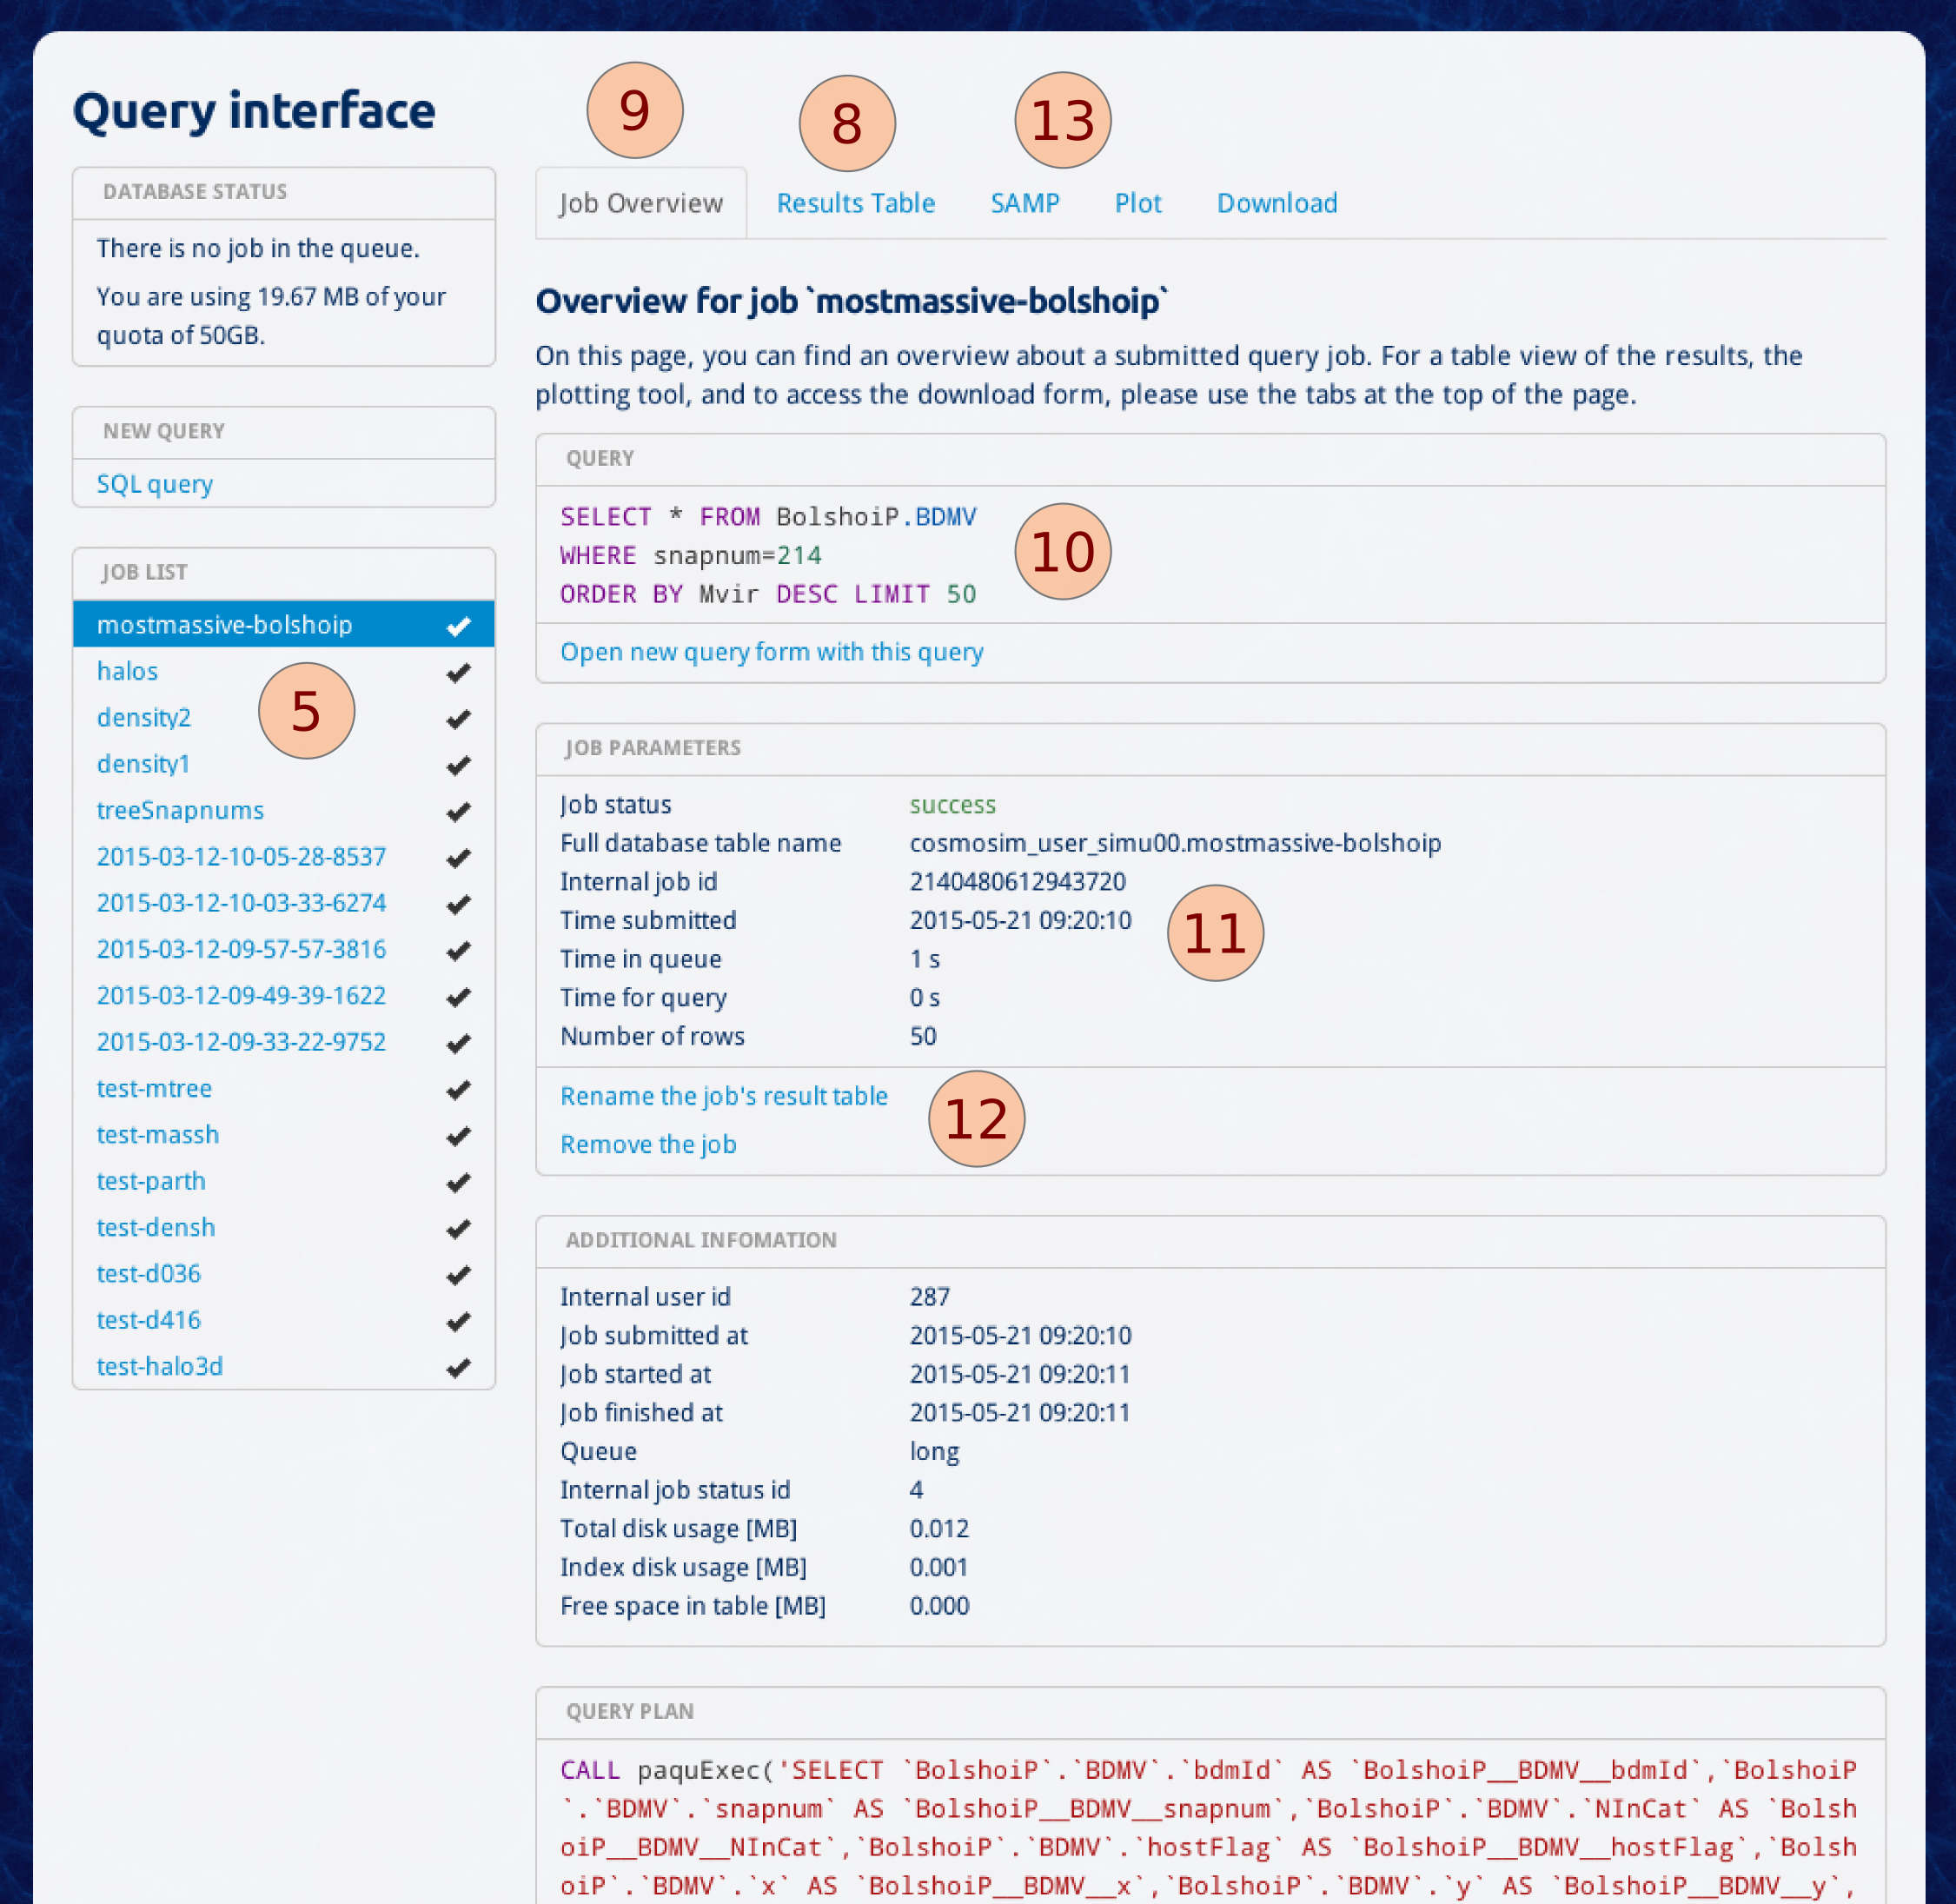
Query interface with the (9) Job Overview for a finished job. Accessible are also the (8) Results Table tab, (10) executed query, (11) job parameters and timing, (12) buttons for renaming or deleting a job as well as (13) SAMP for exchange of data, a simple plot feature and several download options.